CHEAP TRICKS

Design, fashion, collectibles and craft ideas that make cents.

Pages


Powered By Blogger

Thursday, August 26, 2010

Baby plates a cute collectible at any age

I was pregnant with my son when a friend gave me my first antique baby plate for a shower gift.
I fell in love with the nursery rhyme theme, the old-fashioned artwork and the patina of the piece, and just had to have more to decorate my vintage-style nursery.
Well, my son is now 15 years old, and I'm still collecting baby plates and feeding cups. However, they no longer adorn my son's room. I've transferred my collection to a guest bedroom with a vintage juvenile theme where my antique children's plates are showcased on the walls, on shelves and inside a shabby chic pea green cabinet with shelves lined with vintage tatted lace.
While I've been able to acquire a few of the pricier Victorian ABC plates that are so coveted by collectors, the bulk of my collection consists of English painted nursery rhyme plates, which are much more affordable than the older transferware pieces.
English pieces made by Doulton, Wedgewood, Burslem, Wood & Sons and Burlington in the 1930s and 40s as well as plates made in Germany and unmarked vitreous American warming dishes are quite plentiful and can be purchased for less than $30 if you shop around.
Since there is such a variety, some people choose a theme, collecting only ABC plates or BunnykinsRoyal Doulton Bunnykins: A Charlton Standard Catalogue, Third Edition children's dishes. I collect only dishes with nursery rhymes on them.

Monday, August 9, 2010

Mad about hats

There's something to be said about the days when hats were haute couture.
Frankly, I think their popularity in olden times was to cover up bad hair days. Back then, women, for the most part, had longer hair but didn't have the convenience of a daily shower to keep it looking clean and fresh.
Whatever reason for the popularity , there certainly was something regal about a hat, whether it was a pillbox from the 1950s or a cloche from the 1920s.
I've managed to pick up a few choice selections of vintage hats during my inspections of antique shops. I use hats, antique purses, formal gloves and even a mink stole and coat to decorate my bedroom. It's fun to accessorize with vintage clothing, especially things you can actually wear out on special occasions.
I have a guest bedroom where I keep my collection of children's plates and antique toys. There, I've accessorized with some adorable vintage children's and baby's clothes.
You can hang them off closet doors or on racks and they are relatively inexpensive to collect.

Little things make a big statement

Ever since I was a little girl and received my first set of dollhouse furniture, I've been fascinated by miniature things.

There just seemed something magical, perhaps fairylike, about tiny versions of the real items. And, if the full-size things were difficult to create, how much more difficult were their miniature versions to make?

So, I keep my eye out for tiny, detailed miniature paintings and antique doll furniture made with the care and workmanship of the real thing. I've even been able to snag myself some precious carved meerschaum miniature religious sculptures under glass that must of required hours of work, an incredibly steady hand and a great eye for detail.

The nice thing about miniatures is they're just that -- miniature. They don't take up a lot of room so you don't have to worry about display space. In fact, some are so tiny, they get lost unless you display them in larger groups. I like to display my miniature paintings in little groups of three for more impact. I encased a group of meerschaum sculptures in tiny oval frames in a single display case for more visibility. My miniature dressers adorn side tables throughout my house and serve as storage for small things like barrettes for my poodle, rubber bands and playing cards.

Depending on the age, artist and materials, miniatures can get pretty pricey. But there are still some bargains around if you look hard enough.

Tuesday, August 3, 2010

Seasonal secrets

We call it the holiday shelf.
It's an antique pine wall shelf that hangs on the wall next to my front door. It's where I display my seasonal collectibles.
You can always tell what holiday is on the horizon by glancing at my little shelf. I've got antique collectibles representing every holiday. But the holiday that gets the most shelf time, by far, is the Fourth of July. I place my Independence Day collectibles on my shelf in time for Memorial Day and they remain there until Labor Day when they're replaced with my Halloween collectibles.
The exterior of my house gets the red, white and blue treatment as well. I decorate my front porch with bunting and stick miniature flags in plant pots and watering cans. No one can accuse me of a lack of patriotism!

Monday, August 2, 2010

A new use for silver

I don't know about you but I rarely use those baroque-looking Oneida silver-plated trays I received as wedding gifts. Nor do I have much call for sterling silver toothpick holders these days.
However, I've found the perfect use for these items in my master bathroom -- as perfume trays and makeup brush holders.
Sometimes you just have to look at an object in a new light and view it with a new purpose. My eyeliner pencils and makeup brushes were always getting lost in my makeup drawer. The sterling toothpick holders were the perfect means to store my pencils and brushes so they wouldn't get lost. And the decorative holders with the lion's heads on them are so pretty, you don't mind leaving them out on the counter for display. I keep my cotton balls in an antique glass and silver powder jar and my cutips in a larger glass and sterling jar that may once have held cold cream for some Victorian lady. My barrettes and pins go into an antique Art Nouveau covered jewel box. And they all sit beautifully on a tooled silver tray I was going to throw out because it was taking up too much room in my china cabinet.
Yes, the pieces do occasionally require some polishing. Fortunately, I'm one of those people who don't mind polishing silver. The look is well worth it.

Dress up plain wood furniture

When I told you I like to do things cheap, I wasn't kidding you.
I picked up my kitchen table and chairs for a song at an unfinished wood furniture outlet because they'd been on display and were a bit battle-scarred. My kitchen china cabinet, where I display my collection of beloved 1930s and '40s Fiestaware, was a yard sale find at $50. Both were plain pine, but not for long.
I began collecting colorful pints of paint I found on discount on the "Oops Shelf" at Walmart. That's the paint that someone had mixed and decided they didn't like the color. Walmart marks it down to half price so a $6.97 can of paint is less than $4. I chose '50s colors that would complement my Fiestaware and painted each of my four chairs and each leg of my kitchen table a different color. Then I chose my favorite paint color, kind of an aqua blue, to paint the cabinet. I trimmed it out with a rose-red color.
I added a 1950s tablecloth with matching colors, and the result was exactly what I was looking for. Mundane wood pieces were given a colorful facelift, and took the spotlight away from my detested kitchen floor, tiled in a pastel pink and blue. In fact, it helped make the floor fit in with the room's color scheme, which is really no color scheme at all, just color.
As for time, the entire project took all of three days so the results far outweighed the labor. Now I'm gathering up the courage to do something similar to my cream-colored outdated kitchen cabinets. I'll let you know if I decide to take the plunge.

Saturday, July 24, 2010

In a fix

It all began when I acquired a beautiful, rare 1940s Fiesta turquoise footed bowl that would have been worth $150, except it had a big chunk missing from the foot. To the Fiesta collector, who prizes perfect pieces, it was virtually worthless.
"You know, I think I can fix that," said Mr. Fix-It, aka my husband.
He took some putty, the kind you use to fill holes in walls, and filled in the spot where the chip was. When it thoroughly dried. he sanded it down and then, using the paints he used on his model airplanes, painted the chip to match the rest of the bowl. He then finished it off with a coat of polyurethane.
His match was so perfect, you could hardly tell where the chip once was.
But the real test was its durability. Would the repair hold up to the periodic hand washings the bowl would undoubtedly get as it was used?
Well, the repair was done 13 years ago, and the bowl is still as good as new. In the interim, I've become quite the ceramic restorer, perfecting the techniques my husband developed when he repaired that first bowl.
I now have people bring me beloved religious statues, marble busts, heirloom ceramics and other items to repair.
I recently repaired a very heavy 3-foot chalkware statue of Abe Lincoln for a couple. Their granddaughter accidentally knocked it over and Abe's arm broke off. It was a challenge. The piece was so heavy that my usual method of first gluing the pieces back together with Super Glue just wouldn't suffice. I went to Home Depot to seek advice and was told plumber's cement would do the trick. But, no, the arm was still too heavy. So I cut pieces of a wire hanger, drilled holes into the plaster shoulder and side and inserted the wire into the holes to anchor the arm. Once anchored, the glue held. Then I packed the cracks with putty to further strengthen the breaks. Once the putty thoroughly dried, I could mix the paint, blending it to match the existing paint on the piece. Once completed, you could hardly tell it'd been repaired at all. I was pretty pleased with myself.
I was able to perform miracles with a majolica teapot with a broken spout. I inserted a pencil in the remaining spout and molded the putty around the pencil to lengthen the broken spout. I discovered the ideal tool for sanding and shaping the putty afterward is a battery-operated manicure file. The various attachments allow me to sculpt lines into the putty or smooth it out, depending on the effect I'm after.
The artistic, and tricky, part comes with paint. It takes a lot of experimentation to find the right colors and then an artist's concentration to blend the paint to match the existing piece. A coat of polyurethane helps it to blend and gives it durability.
When I finished with Mr. Lincoln and the owner came to retrieve him, he asked how much he owed me. I was momentarily baffled. I'd never charged for my work before. I'd always done it for the challenge of making something broken beautiful again. I didn't know what to charge so I suggested he make a donation to my favorite charity.
It just didn't seem right to accept money for having so much fun.

Monday, June 14, 2010

Saints Alive

Italian-Style Devotional Art Collection:...History of Wax DollsI was at a church tag sale when I happened upon the most beautiful statue I’d ever seen. Carved of wood, it depicted a black woman wearing a vibrant blue dress with the heads of cherubim around her feet. On her head rested a gold metal crown.
“How much” I asked the elderly woman standing nearby as I reverently eyed the 18-inch-tall statue, running my fingers over the intricately carved robe the statue wore.
“Oh, it’s not for sale,” she said. I looked up at her, disappointed, wondering why the statue would be on display if it were not for sale. “It can’t be sold because it’s been blessed by a priest. You can give me a donation for her.”
Being Catholic, I was familiar with the practice of not selling items that were blessed. If you sell them, the blessing does not remain with the item. Being ignorant of the value of such a statue, I offered the woman a $20 donation, thinking that was a fair price. She accepted. I should have offered 10 times that amount.
After some research, I discovered the statue is an excellent Spanish colonial hand-carved example of the Black Madonna, or Our Lady in Czestochawa, Poland. The image is sometimes called Our Lady of Jasna Gora after the name of the monastery site in which it has been kept for six centuries. Its origins are unknown. According to legend, it was created by St. Luke the evangelist who painted the portrait of the Blessed Virgin on the cedar table at which she had taken her meals. St. Helena, the mother of Emperor Constantine, located the portrait and had it transported to Constantinople in the fourth century. After there for five centuries, it made its way to Poland where it came into the possession of St. Ladislaus in the 15th century. St. Ladislaus was determined to protect the image from an attack by the Tartars so he took it across country. During the journey, he stopped at Czestochowa for the night and placed the portrait in a small wooden church named for the Assumption. The following morning, he put the portrait in the wagon to proceed on his journey but the horses refused to move. The portrait had claimed its home.
I’ve since seen similar statues of the Black Madonna selling for thousands of dollars. But my statue has an honored place in my home amongst a growing collection of saint statues known as santos or bultos.
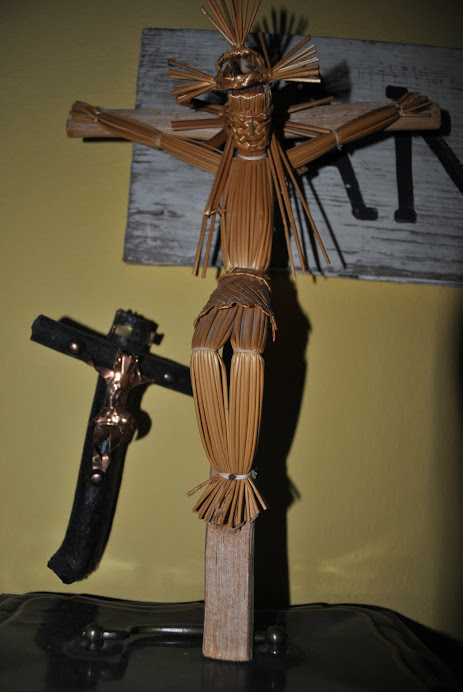
After acquiring my Black Madonna, I became fascinated by these beautiful pieces of art. Some in my collection are newer folk art pieces and some are hundreds of years old.
Like many of my collectibles, I began picking them up for a song before they became highly collectible. Today, I couldn’t afford to purchase my collection.
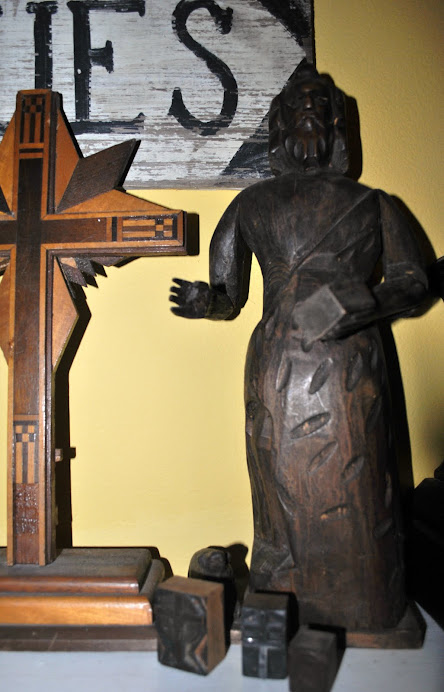
My collection includes various saints including an Infant of Prague with real human hair, carved wooden Simon and Peter statues with ivory faces, and a wood-carved St. Francis of Assisi with articulated arms.
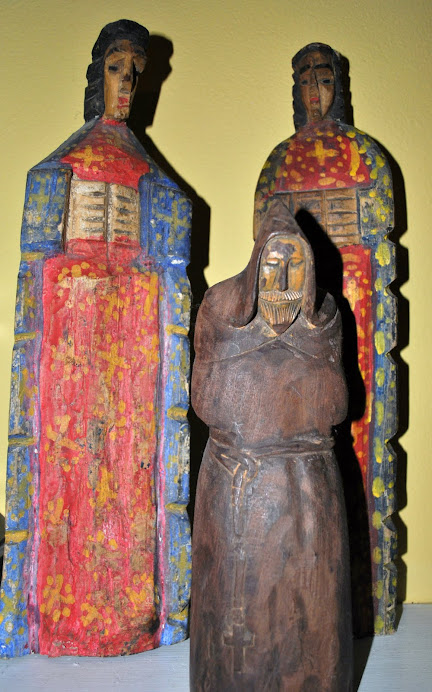
I love the simple painted folk art wood pieces made in Guatemala and Peru depicting St. Francis and Our Savior. There is something so beautiful about their crude simplicity and bright colors.
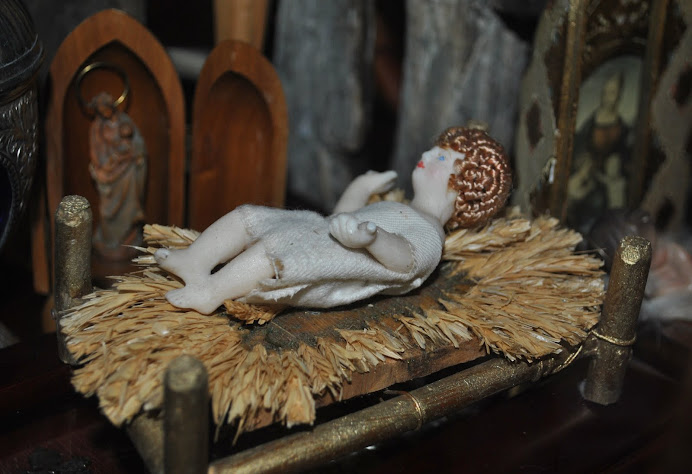
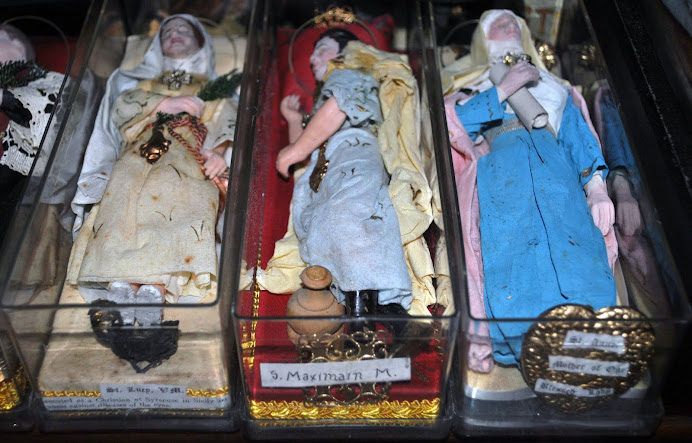
My greatest find, however, is a collection of 15 6-inch wax saints with cloth dress, cotton hair and beards, many accompanied by the saints’ relics. They were most likely made in Germany where wax dolls such as these are common in nativity scenes. I’ve never seen another set of saint dolls. I donated $85 for the set.
In South America, residents will create home altars around santos at which they will pray for the saint to intercede on their behalf. Contrary to some opinion, Catholics don’t pray to saints. We ask saints to pray for us just as you’d ask a friend to pray on your behalf. I wonder about all the requests, large and small, these santos have heard throughout the years.
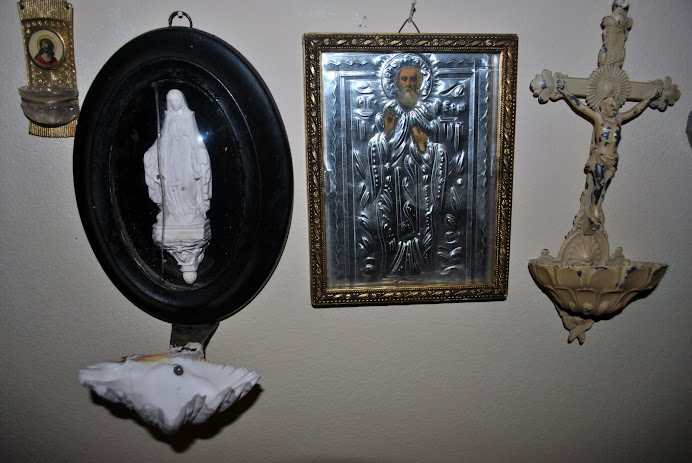
Catholics are known for their love of great devotional art, i.e., the Sistine Chapel. Even the most modest ancient Catholic churches were filled with elaborate statues and stained glasswork.
That love of art carried over into the home with collections of saints and devotional wall art that included elaborately carved Black Forest crucifixes from Germany, intricate copper engravings of scenes from the Bible and richly decorated leather-bound Douay Rheims Bibles.
I’ve been lucky enough to have acquired quite a few pieces of devotional art, which gives me double pleasure for its beauty and spirituality.
Remembering the Infant of Prague statues in their fancy handmade gowns that my grandmother owned, I’ve also become a collector of these more kitschy baby Jesus figures with their satin, sequins and jeweled crowns.
I didn’t realize these were a hot collectible until I saw them displayed in Country Living magazine. I thought I was the only one attracted to these statues from the ‘50s and ‘60s.
It just goes to show, there’s a collector for everything.

Sunday, May 23, 2010

I became attracted to Staffordshire pottery while living in Milford, N.H. and working as a reporter.
I was interviewing a couple who were living in an 1800s colonial townhouse in a town called Wilton and saw these huge pottery dogs sitting on an antique drop-leaf table. I asked the owner about them, and she told me they were Staffordshire Romantic Staffordshire Ceramics (Schiffer Book for Collectors)mantle dogs modeled after the Cavalier King Charles Spaniel Cavalier King Charles Spaniel: Your Happy Healthy Petthat Charles the II, king of England, Scotland and Ireland, was so fond of during his reign from in the 1600s.
The Staffordshire Potteries began making statues of the esteemed royal dog when they began producing ceramics in the 17th century due to the availability of local clay, salt, lead and coal.
Staffordshire is actually a generic name for an industrial area that included the towns of Tunstall, Burslem, Hanley, Stoke, Fenton and Longton, in the area of Staffordshire, England. Hundreds of potteries were in operation during the 1600s through the 1900s, producing everything from dinnerware to the toby jugs and figural spill vases that became the hallmark of the Staffordshire potteries.
Some pieces were marked with the name of the pottery. Others were unmarked but the style defines them as Staffordshire. The intricacy of the design of the spill vases, the bawdy humor of the toby jugsA Century of Royal Doulton Character & Toby Jugs, the subtle political derision of the sculptural figures, the delicate hues of the pearlware Anglo-American Ceramics Part I - Transfer Printed Creamware and Pearlware for the American Market 1760 - 1860 (Anglo-American Ceramic)and the intricacy of the designs of the transferware pieces make Staffordshire pottery highly collectible.
There are Staffordshire potteries still producing dinnerware, collectible figures and toby jugs and mugs today. Some are pretty pricey, too.
But, if you know what you’re looking for, and you search thrift shops, yard sales and estate sales, you can find bargains out there.
I can’t resist those mantle dogs I first saw more than 20 years ago in Wilton, N.H., and have been collecting them ever since when I’ve found them for an affordable price. I have both original and reproduction pieces that I display throughout my home. I’ve also managed to pick up a fair share of spill vases and toby jugs when I could find them for reasonable prices. I love the charming scenes played out on the spill vases, and the colors go well with my collection of antique majolica.The Collector's Encyclopedia of Majolica
I don’t pass up pieces with chips or cracks if I can get them cheaply enough. I become quite an expert at repairing ceramics and pottery. I fill in the chipped area with spackle that you’d use to repair walls and let it dry overnight. Then I use a battery-operated manicure Nail Care Plus Personal Manicure/Pedicure Setto gently sand off the excess spackle and shape it so it matches the rest of the piece. Next I mix acrylic paints to match the piece’s existing paint. Once I have a match, I just dab the paint onto the spackle to hide the chipped area. Once dry, I go back over the chipped area with a small brush containing some polyurethane to seal the repair. Do this enough times and you’ll become such a pro, no one will know there is a repair. I like to challenge my husband to try to find the repair after I’ve completed a job.

Lapping up Staffordshire Pottery

I became attracted to Staffordshire pottery while living in Milford, N.H. and working as a reporter.
I was interviewing a couple who were living in an 1800s colonial townhouse in a town called Wilton and saw these huge pottery dogs sitting on an antique drop-leaf table. I asked the owner about them, and she told me they were Staffordshire mantle dogs modeled after the Cavalier King Charles Spaniel that Charles the II, king of England, Scotland and Ireland, was so fond of during his reign in the 1600s.
The Staffordshire Potteries began making statues of the esteemed royal dog when they began producing ceramics in the 17th century due to the availability of local clay, salt, lead and coal.
Staffordshire is actually a generic name for an industrial area that included the towns of Tunstall, Burslem, Hanley, Stoke, Fenton and Longton, in the area of Staffordshire, England. Hundreds of potteries were in operation during the 1600s through the 1900s, producing everything from dinnerware to the toby jugs and figural spill vases that became the hallmark of the Staffordshire potteries.
Some pieces were marked with the name of the pottery. Others were unmarked but the style defines them as Staffordshire. The intricacy of the design of the spill vases, the bawdy humor of the toby jugs, the subtle political derision of the sculptural figures, the delicate hues of the pearlware and the intricacy of the designs of the transferware pieces make Staffordshire pottery highly collectible.
There are Staffordshire potteries still producing dinnerware, collectible figures and toby jugs and mugs today. Some are pretty pricey, too.
But, if you know what you’re looking for, and you search thrift shops, yard sales and estate sales, you can find bargains out there.
I can’t resist those mantle dogs I first saw more than 20 years ago in Wilton, N.H., and have been collecting them ever since when I’ve found them for an affordable price. I have both original and reproduction pieces that I display throughout my home. I’ve also managed to pick up a fair share of spill vases and toby jugs when I could find them for reasonable prices. I love the charming scenes played out on the spill vases, and the colors go well with my collection of antique majolica.
I don’t pass up pieces with chips or cracks if I can get them cheaply enough. I've become quite an expert at repairing ceramics and pottery. I fill in the chipped area with spackle that you’d use to repair walls and let it dry overnight. Then I use a battery-operated manicure to gently sand off the excess spackle and shape it so it matches the rest of the piece. Next I mix acrylic paints to match the piece’s existing paint. Once I have a match, I just dab the paint onto the spackle to hide the chipped area. Once dry, I go back over the chipped area with a small brush containing some polyurethane to seal the repair. Do this enough times and you’ll become such a pro, no one will know there is a repair. I like to challenge my husband to try to find the repair after I’ve completed a job.

Sunday, May 2, 2010

Nothing Chintzy About It

I was captivated by the all-over pastel flower pattern of chintz china the first time I spotted it at an antiques auction.
Fortunately, no one seemed to know what it was so I was able to acquire the Royal Winton cup and saucer and square-shaped bowl for less than $20.
That was years ago. Today, true chintz made in the 1920s through the late 1960s fetches hundreds of dollars.
Royal Winton is just one of dozens of English manufacturers of the floral dinnerware that was popular for more than 40 years. Others includes James Kent, Crown Ducal, Shelley and Lord Nelson, all producing different patterns of chintz. But they all are generally characterized by an all-over floral pattern similar to the chintz cotton fabric produced in India in the 17th century.
Most of the true English pieces are marked on the bottom. If the piece isn't marked, it's most likely newer and made in Japan.
With the rise in popularity, Chintz is being reproduced now. You can purchase beautiful reproduction chintz dinnerware sets in retail stores. Just don't pay antiques prices for them. The picture frame I show in the photograph below is a reproduction. The quality isn't quite the same and a discerning eye can tell the difference. But, if you check out ebay and thrift shops, you can still find bargains on the real thing.

Wednesday, April 28, 2010

The Magic of Majolica

I knew nothing about the pottery pitcher shaped like a fish when I first spotted it 20 years ago at an antiques auction.
My husband and I had just purchased a dilapidated 1926 bungalow that we were renovating, and I was looking for some inexpensive antique fixtures to replace the modern ones installed by the previous owners. The ad for the auction promised a working 1920s Chambers stove and a claw-foot bathtub.
As I perused the goodies up for bid, the fish pitcher caught my eye and I was captivated by the pastel colors of the piece -- the pink, gray and turquoise hues -- as well as the detail of the design.
Judging from the crazing, the piece was old. I had no idea how old. I just fell in love with it and decided to bid, hoping it wouldn't go out of my price range.
It didn't. I won the pitcher for $15, knowing it would soon occupy a place of honor on my antique pine stepback cupboard.
Later, while glancing through a book on antiques, I spotted an identical fish pitcher and was surprised to learn I owned a piece of Victorian majolica pottery. That began a 20-year preoccupation with majolica and an extensive collection that's taken over my living room.
Potter Herbert Minton first introduced majolica at London's Crystal Palace Exhibition in 1851. Minton designed the pottery and chemist Leon Arnoux developed the glazing process.
The pottery was an instant hit with Victorians who were fascinated by nature and loved the subjects of the pottery -- leaves, seashells, fish, birds, flowers, fruit.
Majolica is a porous eathernware fired at a low temperature, giving it a light yellow color. The pottery is then painted with glazes made from tin or lead. Then it is re-fired.
The lustrous glaze and soft colors made the pottery especially appealing. Soon, potters throughout Europe and across the pond in the United States were following Minton's example and producing majolica pieces.
The potters were extremely creative in their designs, turning corn cobs into pitchers and cauliflower florets into teapots.
Some of the more rare examples and pieces by the more coveted makers, like Minton, fetch thousands of dollars today.
However, you still can purchase some beautiful majolica leaf plates for as little as $30 on ebay.
Just be careful. There are quite a few reproductions being made. It's easy to tell the real McCoy, however. The new majolica just hasn't been able to duplicate the richness of color of the original pieces.
That's not to say you shouldn't purchase reproductions. I bought a beautiful reproduction cheese keeper for a song, knowing I'd never be able to afford the real thing.
Don't pass up chipped pieces if they are reasonably priced, either. They can be professionally repaired, and majolica is one of the few antiques that aren't greatly devalued if repaired.

Friday, April 23, 2010

Make your own make-dos

Early Americans were the ultimate recyclers.
They didn't live in a world of conspicuous consumption like we do today. Instead, their belongings tended to be meager and they prized what little they owned.
Nevertheless, periodically a vase or candlestick would break. Rather than throw the item away, however, our ancestors would transform the unbroken base into useful items such as a pin cushion.
That's the origin of what antique dealers call "make-do." These cleverly recycled items are now coveted for their folk art appeal and sell for hundreds of dollars.
I began making my own make-dos after purchasing a homemade make-do on ebay. I decided to try replicating it using an old cutter quilt, the strawberry needle sharpener from an old tomato-shaped pin cushion, and assorted vintage buttons and bric-brac. I liked the result so much, I began making make-dos as gifts for family and friends. They don't take a lot of work. Just use your imagination, vintage fabric and any cast-offs you find laying around the house.

Tuesday, April 20, 2010

Old-World Walls

If you like the look of the Old-World, time-worn walls you see in English cottages and Italian villas, you'll love this trick.
It's easy and fun. And I just love the unplanned textures that result from this method.
Just purchase a bucket of spackling plaster, the kind you use to repair drywall. Take a trowel and spread the spackle over your walls in various directions. Don't be neat. You can leave streaks, air pockets and lumps to add character. You don't need to cover every bit of surface, either, just enough to give it a rough texture.
Next, choose a favorite paint color and either water it down or mix it with a glaze to dilute it. I've used both water and glaze, and, as far as I'm concerned, you can save your money on the glaze.
Then simply wipe the paint over the wall with an old rag. The paint will adhere to the plaster and give the wall varying colors and textures.
It takes just two days to complete a small room -- one day to spackle and the next day to wash with color. It's actually less tedious than painting with a brush where perfection is the preference. With this method, drips and "vacations" are perfectly acceptable. In fact, they add to that Old-World appearance.

Custom sewn is a cinch

While my mother was teaching my older sister how to sew, I was way too busy playing kickball with the boys in the neighborhood.
I realized my error years later. I coveted my relatives' ability to whip up a pillow, curtains or tablecloth on the sewing machine at a whim, and was determined to acquire the ability, even if I had to teach myself.
And I did. I purchased a used Brothers sewing machine and, after trial and error, figured out how to thread a spool and needle. I can now sew a straight hem. That's pretty much the limit to my sewing abilities but I've found you can do a lot if you can sew a hem. You can make pillows, curtains, cushions, tablecloths, napkins, even chair and sofa covers.
I've made curtains out of tablecloths, antique fabric remnants, sheets and lengths of leftover yardage on sale at the fabric store. With my little hand-me-down sewing machine, I've adorned them with trims, lace and funky chenille balls. I've made curtains to cover unsightly glass shower doors, to spruce up louvered closet doors and shade massive sliding-glass doors.
My upstairs guest bathroom curtain is actually half of a round tablecloth I purchased at Big Lots that coordinated with the shower curtain. I simply cut it in half, hemmed the trimmed edge and tacked it to the wall with decorative tacks. I used the leftover half of the tablecloth to create a cushion for the wrought-iron vanity chair in the bathroom.
My guest bedroom features a cacophony of vintage fabrics in a variety of colors. I truly have no color scheme in this room. I simply mix and match vintage fabrics of all hues and patterns. My guest bedroom curtain consists of a strip of vintage barkcloth, part of a long tattered curtain purchased at a yard sale. Forming a ruffle beneath it is a piece of red-and-white checked vintage tablecloth.
My guest bathroom louvered door is covered in a black toile fabric, purchased at Wal-Mart for $1.96 a yard, and a black-and-white checked napkin. I left the fringe on the napkin showing and simply attached the black toile beneath. Then I gathered the curtain on a simple pressure rod. You can push it aside to open the louvered door of the little-used storage closet.
For the master bedroom, I used strips of contrasting material to anchor and lift the curtain, giving it a pouffed look.
All of this was accomplished with just simple sewing basics anyone can teach herself.

Stainless steel transformation

Our house came with an old 1980s Frigidaire refrigerator and dishwasher in the ivory color so popular to the decade.
The look was very outdated. Unfortunately, Frigidaire made some hardy products. They still worked perfectly well and, with so many other home improvement needs, we couldn't justify the expense of buying new appliances.
I was perusing the goodies at the Home Depot one day when I spotted a stainless steel paint made especially for outdated appliances like mine. The instructions said I could transform my mundane appliances into gleaming stainless steel appliances with no more than a paintbrush, sandpaper and coat of polyurethane.
The paint kit wasn't cheap -- $25. But compared to the price of new appliances, it was a bargain. I decided to give it a try.
After thoroughly cleaning my appliances, I gave them a light sanding as instructed so the paint would adhere. The instructions suggested using a small roller to apply the oil based paint. I used a crafts paint brush to paint the handle and the tight spots in between the refrigerator door and the seal.
After the first coat had been applied, I was dismayed at the results. The paint didn't begin the cover the old ivory appliance. I re-read the instructions, which assured me it would take another coat to thoroughly cover the old refrigerator and dishwasher. Someone lied. It actually took three coats and an entire weekend of work because the oil-based paint needed to dry in between.
But once all three coats were on, followed by a coat of polyurethane to seal the paint, I had the look of stainless steel appliances. Just don't look too closely or you can tell they've been painted.
On a scale of 1 to 10, I'd rate the product about a 7 for ease of application and effectiveness. Frankly, I'd rather have the real stainless steel appliances.

Made in the shade

To me, there's nothing more boring than a plain lamp shade.
I view lamp shades as one more opportunity to emphasize the theme of a room, provide color and texture and add one more decorative element.
It's easy to "accessorize" a lamp shade with a ribbon rose, antique jewels or milliner's flowers, lace, ruffled trim, beads, decoupage, you name it. Let your imagination go wild.
Shades are fairly cheap, especially the way I buy them -- at yard sales and thrift shops. Don't be afraid to spruce up a shade with a coat of paint or some stencils. Even cloth shades can be painted.
My favorite technique is to cover a lampshade with a fabric remnant, usually purchased from the remnant bin at the fabric store.
Just paint the shade with a mixture of white glue and water, wrap the fabric around it and fold it over at the edge. Use a little glue to seal the edge. Then use scissors to trim excess fabric from the top and bottom of the shade. Camouflage the edges by gluing on ribbon, lace, ruffles, an antique beaded necklace, etc...
My husband's office has a hunting and fishing theme so I took an old metal bait bucket, set a lamp inside it and then decoupaged a lampshade with antique colored engravings of fish I'd copied from the Internet. I finished it off by displaying some of his antique lures on the shade.

Sunday, April 18, 2010

Open the door to a whole new look in cabinets

As I discussed in my first post, one of the things I disliked about our home when we purchased it were the outdated 1980s European-style cabinets in the kitchen and three bathrooms.
You've seen the kind of cabinets I'm talking about. Mine were ivory laminate with a strip of inset oak wood at the top used to open the drawers and cabinets, instead of hardware. They just didn't fit in with the traditional look I was after. But, with a limited budget for home renovations, replacing or refacing the cabinetry wasn't an option in the near future. I either had to live with the outdated cabinets or try to disguise them.
My remedy proved to be an easy one, requiring only a few feet of decorative trim from Home Depot, some antique hardware purchased at a yard sale and a bit of paint.
For the master and upstairs bathrooms, which have a more formal look, I chose a decorative rope trim approximately the width of the oak trim. I used a hand saw to cut the trim the length of each cabinet door and drawer. I then attached the trim directly on top of the oak pulls, first with wood glue and then with finishing nails to secure the pieces. I then sanded the laminate and painted it and the trim with an ivory paint. To give it an aged appearance, I painted over the entire surface again with a dark brown watered-down paint that I then wiped off, leaving the dark paint in the grooves of the trim. Next, I measured and drilled holes in the cabinet drawers and doors for the antique hardware I'd purchased, and installed the new decorative pulls. With new "old-fashioned" faucets installed with the help of my husband, the result was even better than I expected. No one looking at the cabinetry could tell it camouflaged ugly European cabinets.
For the downstairs guest bathroom off the family room, which has a more casual decor, I chose to frame the cabinet doors and drawer with plain, flat 1-inch-wide wood pieces. And since the pieces were unadorned, I didn't even have to worry about cutting them at 45-degree angles.
Because the wood pieces were wider than the inset oak pulls, I couldn't nail them directly on top of the oak so I glued and nailed them just below the old oak pulls. I then disguised the old pulls by painted it the same ivory as the rest of the cabinet and antiquing it with a darker paint. You can still see the indentations of the oak pulls, but they're hardly noticeable.
I liked the look so much, I plan to do the same for my kitchen cabinets. It'll be a lot more work but the result and savings will be worth it.

Wednesday, April 14, 2010

Instant Masterpiece

Can't afford original paintings? Here's an easy trick I use to create instant masterpieces.
My father-in-law's neighbor gave him a bunch of Sotheby's and Christie's auction catalogs, which he promptly bestowed on me, knowing how much I love art.
I cut out photos of masterpieces I liked and then found frames at Goodwill to fit them. Next, I glued the prints onto the glass with a glue stick.
Here's where the creativity comes in. I added brush strokes to the prints, turning them into paintings, with the help of a small can of polyurethane. I've included some photos below.
In the 1800s, sailors often spent long, loney months on the seas searching for the big catch or hauling goods from one coast to the next. To pass the time, they'd create what are now a coveted antique collectible, sailors valentines. They'd use assorted decorative shells to decorate old cigar boxes or arrange them in frames in intricate patterns. The natives on the island of Barbados also made the shell items to sell to sailors as souvenirs for their loved ones.
I began collecting seashells on vacations to Sanibel Island, Fla., the seashell mecca of the world, and fell in love with the natural beauty and hues of these jewels of the sea. But it wasn't until I uncovered my first sailors' valentine at a yard sale in Seminole Heights, a Tampa neighborhood, that I realized how magnificent they were put together to form symmetrical patterns. The work involved in some of these valentines is absolutely incredible.
This led me to begin creating my own sailors' valentines as well as a popular 20th-century variation -- using seashells to create crucifixes and holy water fonts. I tried various types of glue, a glue gun, even clay and spackling to attach the shells. But, frankly, the best adhesive I've found is plain old Elmer's glue. Creating the decorative boxes and other items has become my therapy. In the tradition of the sailors, I now incorporate accessories, such as an antique velvet heart, an antique ceramic mermaid, faux pearls from an antique necklance with a broken clasp, a cameo pin with a broken clasp.
I find both the boxes and shells at yard sales and thrift stores, paying no more than $2. I was thrilled yesterday to discover a huge bag of shells for sale at the Lighthouse Ministry for the Blind thrift shop yesterday for just $2. I had a cigar box I'd purchased at a yard sale for 50 cents that was just begging for shells. I also buy old shell necklaces to use because the small similarly sized shells are ideal for making patterns on sailors' valentines or filling in between the larger shells. I once snagged a plant hanger made entirely of shells at a yard sale for 25 cents.
After seeing a similar project in a home-decorating magazine, I began my most ambitious shell project -- encrusting an old chandelier with shells. I had hung a metal chandelier (yes, purchased at a yard sale) in my master bathroom and decorated it with crystals and antique beads. But it still lacked a certain panache. So I decided to turn it into a shell project. I used the spackling I use to antique my walls to adhere the shells to the chandelier while it was still hanging. Once dried, I painted the entire chandelier with Elmer's glue and then sprayed it with polyurethane. I haven't lost a single shell, but if I did I'd simply spackle and glue it back on.
I completed the chandelier by recovering the shades in an old-fashioned barkcloth material to match new curtains and trimming them with a piece of antique lace. I sewed a cord cover for the chandelier chain and attached it with Velcro strips.
I was pretty pleased with the result, if I do say so myself.

Tuesday, April 13, 2010

Ugly European cabinets? No problem

We bought our house in 1996 because we loved its traditional two-story style, the fact that it backed up to a 200 acre conservation tract along the Alafia River and details like the oak staircase, balconied library, fireplaces in the family room and master bedroom and huge swimming pool.
Its attributes far outweighed its deficits like its outdated 1980s European cabinetry. I knew it was going to be awhile before we could afford to have the cabinets replaced or refaced but I didn't know how I was going to stand living with these modern cabinets in an otherwise traditional home.
A yard sale provided the answer. Someone was selling a length of rope wood trim for a couple of dollars. What the heck, I said to myself, and I purchased the trim. A couple of months later, at another yard sale, someone was selling some antique drawer pulls for a few bucks. They were gorgeous. I bought those as well. I was ready to begin my experiment with the guest bathroom.
I sanded the ivory laminate cabinets and then borrowed my husband's scroll saw to cut the wood trim the length of the two cabinet doors. I used wood glue to glue them just beneath the oak pull insets of the European cabinet pulls and then tacked them into place with nails. Next I painted the entire cabinet with an ivory paint and, when it was dry, wiped it with a watered-down black paint and wiped off the excess so just touches of the black paint remained in the grooves. I finished it off by drilling holed in the laminate for the antique cabinet pulls I'd painted black and then inserting them into the holes. It completely disguised the European cabinetry. Now, all I had to do was talk my husband into installing the black faucets I'd purchased on sale from Home Depot for $79 to complete the look.
But it still wasn't quite right. There was still that plain mirror hanging above the sink with the stainless steel trim. And, surely, I could do something with that brass light fixture hanging above the mirror.
I purchased an anondized black paint the same color as the faucet and painted the light fixture so it would match. I then decorated it with strings of antique pearl and black beads. Then, I actually found the same rope trim at Home Depot and cut it at a 45-degree angle to create a picture frame around the mirror, which I simple painted the same ivory and stained with black and then glued to the mirror with a heavy-duty glue. It's been up for two years and hasn't shown any signs of falling.
I decided I didn't like the louvered closet door in the bathroom so I sewed a curtain in a black checked and black toile material and hung it over the closet door with a pressure rod. I used the same materials for a shower curtain, window curtain and cushion for the vanity seat. With some leftover scraps, I decorated some white towels.
The walls were a happy accident. I had purchased a black toilet-tissue holder and towel rack at Marshall's. When I tore the existing ceramic tissue and towel holders out of the wall, they left gaping holes that had to be filled with spackle. I liked the rustic, Mediterranean look from spackling the holes and decided to try spackling the rest of the walls. I then painted them with a light gray wash, and the spackle caused variations in the paint that made the walls look ancient.
Accents, such as a couple of 1700s black and white engravings and a scientific study of pearls, purchased at yard sales, completed the look.

So, You've Got Taste But No Money

I'm in the same boat. A lot of people have boarded the S.S. Minusmoola since the recession hit. It doesn't mean you have to live in a state of abject poverty just because you lack the funds to buy the amenities you once enjoyed. It just means you have to get a little more creative.
I got the idea for this blog because people kept remarking on my ability to do so much with so little. I'm frugal but I like to dress well and have a home that's tasteful and well-decorated.
I'm a journalist by occupation but I'm a closet interior decorator, art collector, antiques lover, crafter, fashionista and gardener in my spare time.
I love perusing home-decorating magazines and my favorite television channels are HGTV and DYI.
But, come on, folks. How many people can really afford to spend $9,000 for the home wine cellar recently featured on the DYI network? And how many of us have an army of helpers ready to help us install our new bathroom like they do on the Home and Garden channel?
I recently repainted my entire living room, cathedral ceilings and all. And my poor, overworked husband didn't have time to help me move a stick of furniture.
I managed to paint the entire room with just one gallon of parchment-colored paint from the "oops" shelf at Wal-Mart purchased for a whopping $6.99. How? I turned it into a wash by watering it down, doubling the amount of paint and giving the walls an Old-World, weathered look that went perfectly with my slip-covered antique furniture, Chinese silk curtains I made myself from remnants and mounted to bamboo poles and 19th-century majolica pottery.
Most of the 19th-century majolica, by the way, was purchased at antique shops, yard sales and estate sales long before majolica became the popular collectible it is today. I started collecting it because I loved the turquoise, pink and green hues, and various animals and plant designs. I had no idea that the pieces I was paying $20 for would soon be worth $220.
In future blogs, I'll provide tips on how to identify antiques and collectibles at thrift stores, tag sales and garage sales.
I'll also show you how you can turn mundane bathroom and kitchen cabinets into fabulous showpieces without refacing or replacing; how to update a ho-hum chandelier; how to make a boring concrete patio look faux fabulous; how to antique walls, how to give your appliances a whole new look; how to update your outdated tile; and lots of other ideas for very little money.
Welcome aboard.

An icon and a meerschaum holy water font

An icon and a meerschaum holy water font

LinkWithin

An unusual straw crucifix

An unusual straw crucifix

An articulated St. Francis of Assisi

An articulated St. Francis of Assisi

Three vintage wooden santos

Three vintage wooden santos

A German wax baby Jesus on a bed of straw

A German wax baby Jesus on a bed of straw

wax saint dolls

wax saint dolls