I knew nothing about the pottery pitcher shaped like a fish when I first spotted it 20 years ago at an antiques auction.
My husband and I had just purchased a dilapidated 1926 bungalow that we were renovating, and I was looking for some inexpensive antique fixtures to replace the modern ones installed by the previous owners. The ad for the auction promised a working 1920s Chambers stove and a claw-foot bathtub.
As I perused the goodies up for bid, the fish pitcher caught my eye and I was captivated by the pastel colors of the piece -- the pink, gray and turquoise hues -- as well as the detail of the design.
Judging from the crazing, the piece was old. I had no idea how old. I just fell in love with it and decided to bid, hoping it wouldn't go out of my price range.
It didn't. I won the pitcher for $15, knowing it would soon occupy a place of honor on my antique pine stepback cupboard.
Later, while glancing through a book on antiques, I spotted an identical fish pitcher and was surprised to learn I owned a piece of Victorian majolica pottery. That began a 20-year preoccupation with majolica and an extensive collection that's taken over my living room.
Potter Herbert Minton first introduced majolica at London's Crystal Palace Exhibition in 1851. Minton designed the pottery and chemist Leon Arnoux developed the glazing process.
The pottery was an instant hit with Victorians who were fascinated by nature and loved the subjects of the pottery -- leaves, seashells, fish, birds, flowers, fruit.
Majolica is a porous eathernware fired at a low temperature, giving it a light yellow color. The pottery is then painted with glazes made from tin or lead. Then it is re-fired.
The lustrous glaze and soft colors made the pottery especially appealing. Soon, potters throughout Europe and across the pond in the United States were following Minton's example and producing majolica pieces.
The potters were extremely creative in their designs, turning corn cobs into pitchers and cauliflower florets into teapots.
Some of the more rare examples and pieces by the more coveted makers, like Minton, fetch thousands of dollars today.
However, you still can purchase some beautiful majolica leaf plates for as little as $30 on ebay.
Just be careful. There are quite a few reproductions being made. It's easy to tell the real McCoy, however. The new majolica just hasn't been able to duplicate the richness of color of the original pieces.
That's not to say you shouldn't purchase reproductions. I bought a beautiful reproduction cheese keeper for a song, knowing I'd never be able to afford the real thing.
Don't pass up chipped pieces if they are reasonably priced, either. They can be professionally repaired, and majolica is one of the few antiques that aren't greatly devalued if repaired.


Wednesday, April 28, 2010
Friday, April 23, 2010
Make your own make-dos
Early Americans were the ultimate recyclers.
They didn't live in a world of conspicuous consumption like we do today. Instead, their belongings tended to be meager and they prized what little they owned.
Nevertheless, periodically a vase or candlestick would break. Rather than throw the item away, however, our ancestors would transform the unbroken base into useful items such as a pin cushion.
That's the origin of what antique dealers call "make-do." These cleverly recycled items are now coveted for their folk art appeal and sell for hundreds of dollars.
I began making my own make-dos after purchasing a homemade make-do on ebay. I decided to try replicating it using an old cutter quilt, the strawberry needle sharpener from an old tomato-shaped pin cushion, and assorted vintage buttons and bric-brac. I liked the result so much, I began making make-dos as gifts for family and friends. They don't take a lot of work. Just use your imagination, vintage fabric and any cast-offs you find laying around the house.
Tuesday, April 20, 2010
Old-World Walls
If you like the look of the Old-World, time-worn walls you see in English cottages and Italian villas, you'll love this trick.
It's easy and fun. And I just love the unplanned textures that result from this method.
Just purchase a bucket of spackling plaster, the kind you use to repair drywall. Take a trowel and spread the spackle over your walls in various directions. Don't be neat. You can leave streaks, air pockets and lumps to add character. You don't need to cover every bit of surface, either, just enough to give it a rough texture.
Next, choose a favorite paint color and either water it down or mix it with a glaze to dilute it. I've used both water and glaze, and, as far as I'm concerned, you can save your money on the glaze.
Then simply wipe the paint over the wall with an old rag. The paint will adhere to the plaster and give the wall varying colors and textures.
It takes just two days to complete a small room -- one day to spackle and the next day to wash with color. It's actually less tedious than painting with a brush where perfection is the preference. With this method, drips and "vacations" are perfectly acceptable. In fact, they add to that Old-World appearance.
Custom sewn is a cinch
While my mother was teaching my older sister how to sew, I was way too busy playing kickball with the boys in the neighborhood.
I realized my error years later. I coveted my relatives' ability to whip up a pillow, curtains or tablecloth on the sewing machine at a whim, and was determined to acquire the ability, even if I had to teach myself.
And I did. I purchased a used Brothers sewing machine and, after trial and error, figured out how to thread a spool and needle. I can now sew a straight hem. That's pretty much the limit to my sewing abilities but I've found you can do a lot if you can sew a hem. You can make pillows, curtains, cushions, tablecloths, napkins, even chair and sofa covers.
I've made curtains out of tablecloths, antique fabric remnants, sheets and lengths of leftover yardage on sale at the fabric store. With my little hand-me-down sewing machine, I've adorned them with trims, lace and funky chenille balls. I've made curtains to cover unsightly glass shower doors, to spruce up louvered closet doors and shade massive sliding-glass doors.
My upstairs guest bathroom curtain is actually half of a round tablecloth I purchased at Big Lots that coordinated with the shower curtain. I simply cut it in half, hemmed the trimmed edge and tacked it to the wall with decorative tacks. I used the leftover half of the tablecloth to create a cushion for the wrought-iron vanity chair in the bathroom.
My guest bedroom features a cacophony of vintage fabrics in a variety of colors. I truly have no color scheme in this room. I simply mix and match vintage fabrics of all hues and patterns. My guest bedroom curtain consists of a strip of vintage barkcloth, part of a long tattered curtain purchased at a yard sale. Forming a ruffle beneath it is a piece of red-and-white checked vintage tablecloth.
My guest bathroom louvered door is covered in a black toile fabric, purchased at Wal-Mart for $1.96 a yard, and a black-and-white checked napkin. I left the fringe on the napkin showing and simply attached the black toile beneath. Then I gathered the curtain on a simple pressure rod. You can push it aside to open the louvered door of the little-used storage closet.
For the master bedroom, I used strips of contrasting material to anchor and lift the curtain, giving it a pouffed look.
All of this was accomplished with just simple sewing basics anyone can teach herself.
Stainless steel transformation
Our house came with an old 1980s Frigidaire refrigerator and dishwasher in the ivory color so popular to the decade.
The look was very outdated. Unfortunately, Frigidaire made some hardy products. They still worked perfectly well and, with so many other home improvement needs, we couldn't justify the expense of buying new appliances.
I was perusing the goodies at the Home Depot one day when I spotted a stainless steel paint made especially for outdated appliances like mine. The instructions said I could transform my mundane appliances into gleaming stainless steel appliances with no more than a paintbrush, sandpaper and coat of polyurethane.
The paint kit wasn't cheap -- $25. But compared to the price of new appliances, it was a bargain. I decided to give it a try.
After thoroughly cleaning my appliances, I gave them a light sanding as instructed so the paint would adhere. The instructions suggested using a small roller to apply the oil based paint. I used a crafts paint brush to paint the handle and the tight spots in between the refrigerator door and the seal.
After the first coat had been applied, I was dismayed at the results. The paint didn't begin the cover the old ivory appliance. I re-read the instructions, which assured me it would take another coat to thoroughly cover the old refrigerator and dishwasher. Someone lied. It actually took three coats and an entire weekend of work because the oil-based paint needed to dry in between.
But once all three coats were on, followed by a coat of polyurethane to seal the paint, I had the look of stainless steel appliances. Just don't look too closely or you can tell they've been painted.
On a scale of 1 to 10, I'd rate the product about a 7 for ease of application and effectiveness. Frankly, I'd rather have the real stainless steel appliances.
Made in the shade
To me, there's nothing more boring than a plain lamp shade.
I view lamp shades as one more opportunity to emphasize the theme of a room, provide color and texture and add one more decorative element.
It's easy to "accessorize" a lamp shade with a ribbon rose, antique jewels or milliner's flowers, lace, ruffled trim, beads, decoupage, you name it. Let your imagination go wild.
Shades are fairly cheap, especially the way I buy them -- at yard sales and thrift shops. Don't be afraid to spruce up a shade with a coat of paint or some stencils. Even cloth shades can be painted.
My favorite technique is to cover a lampshade with a fabric remnant, usually purchased from the remnant bin at the fabric store.
Just paint the shade with a mixture of white glue and water, wrap the fabric around it and fold it over at the edge. Use a little glue to seal the edge. Then use scissors to trim excess fabric from the top and bottom of the shade. Camouflage the edges by gluing on ribbon, lace, ruffles, an antique beaded necklace, etc...
My husband's office has a hunting and fishing theme so I took an old metal bait bucket, set a lamp inside it and then decoupaged a lampshade with antique colored engravings of fish I'd copied from the Internet. I finished it off by displaying some of his antique lures on the shade.
Sunday, April 18, 2010
Open the door to a whole new look in cabinets
As I discussed in my first post, one of the things I disliked about our home when we purchased it were the outdated 1980s European-style cabinets in the kitchen and three bathrooms.
You've seen the kind of cabinets I'm talking about. Mine were ivory laminate with a strip of inset oak wood at the top used to open the drawers and cabinets, instead of hardware. They just didn't fit in with the traditional look I was after. But, with a limited budget for home renovations, replacing or refacing the cabinetry wasn't an option in the near future. I either had to live with the outdated cabinets or try to disguise them.
My remedy proved to be an easy one, requiring only a few feet of decorative trim from Home Depot, some antique hardware purchased at a yard sale and a bit of paint.
For the master and upstairs bathrooms, which have a more formal look, I chose a decorative rope trim approximately the width of the oak trim. I used a hand saw to cut the trim the length of each cabinet door and drawer. I then attached the trim directly on top of the oak pulls, first with wood glue and then with finishing nails to secure the pieces. I then sanded the laminate and painted it and the trim with an ivory paint. To give it an aged appearance, I painted over the entire surface again with a dark brown watered-down paint that I then wiped off, leaving the dark paint in the grooves of the trim. Next, I measured and drilled holes in the cabinet drawers and doors for the antique hardware I'd purchased, and installed the new decorative pulls. With new "old-fashioned" faucets installed with the help of my husband, the result was even better than I expected. No one looking at the cabinetry could tell it camouflaged ugly European cabinets.
For the downstairs guest bathroom off the family room, which has a more casual decor, I chose to frame the cabinet doors and drawer with plain, flat 1-inch-wide wood pieces. And since the pieces were unadorned, I didn't even have to worry about cutting them at 45-degree angles.
Because the wood pieces were wider than the inset oak pulls, I couldn't nail them directly on top of the oak so I glued and nailed them just below the old oak pulls. I then disguised the old pulls by painted it the same ivory as the rest of the cabinet and antiquing it with a darker paint. You can still see the indentations of the oak pulls, but they're hardly noticeable.
I liked the look so much, I plan to do the same for my kitchen cabinets. It'll be a lot more work but the result and savings will be worth it.
Subscribe to:
Posts (Atom)
An icon and a meerschaum holy water font

LinkWithin

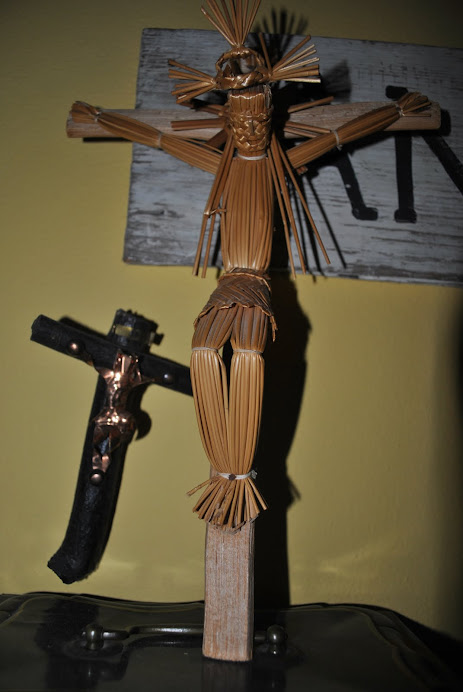
An unusual straw crucifix
An articulated St. Francis of Assisi

Three vintage wooden santos

A German wax baby Jesus on a bed of straw

wax saint dolls
